Fonts are an important but quiet part of language that most people don’t notice. How we see things, how we feel, and how we learn are all different because of them. Bangla fonts are crucial in showing how to write the Bengali language on smart devices.
In this article, you will learn how to install Bangla Font on Windows and Mac computers. Installing a font on Windows is a straightforward process. You can easily add any font to your Windows or Mac devices with a few clicks. Here’s a step-by-step guide:
Installing Bangla Fonts on a Windows PC:
Windows is the most popular operating system in the world. It’s dominating the market with a market share of around 70 percent. Let’s see how you can add Bangla fonts to your Windows computer.
Download and extract the font: First, you need to download the font file you want to install. Fonts are often distributed in compressed formats like ZIP files, so you may need to extract the contents.
If the font file is in a ZIP archive, right-click on the file and select “Extract All” to unzip its contents. This step is not necessary if the font file is already in a usable format (like .ttf or .otf).
Install the font: Once you have the font file ready, you can install it by following these steps:
Option 1: Right-click Install:
Right-click on the font file (with the .ttf or .otf extension).
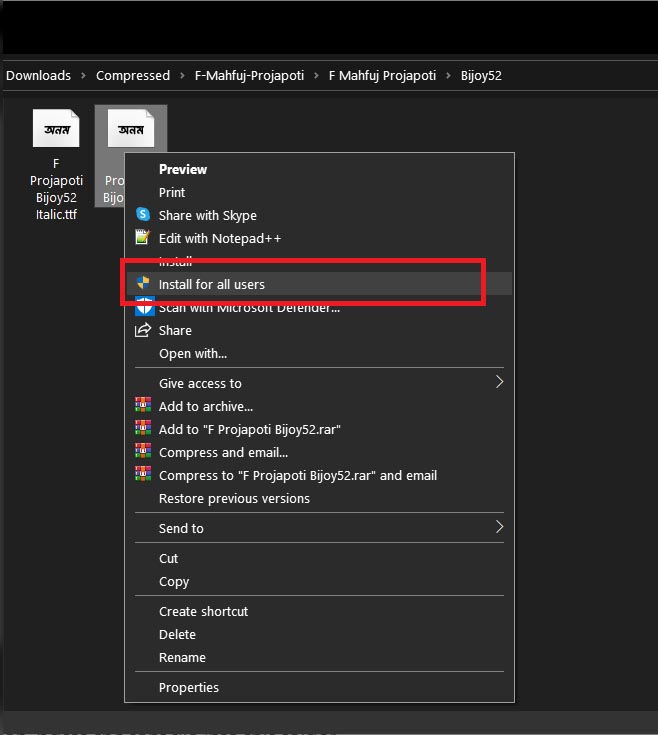
Select “Install” from the context menu.
Option 2: Manual Installation:
Copy the font file to the Fonts folder on your computer. You can usually find this folder in C:\Windows\Fonts.
You can open the Fonts folder by pressing Win + R to open the Run dialogue, typing fonts, and hitting Enter. Then, paste the font file into this folder.
To make sure the font is installed, open a text editor or a word processing application and check if the newly installed font appears in the font list.
Installing Bangla Fonts on a Mac:
The MAC operating system is another popular OS worldwide. Let’s see how you can add Bangla fonts to your MAC computer.
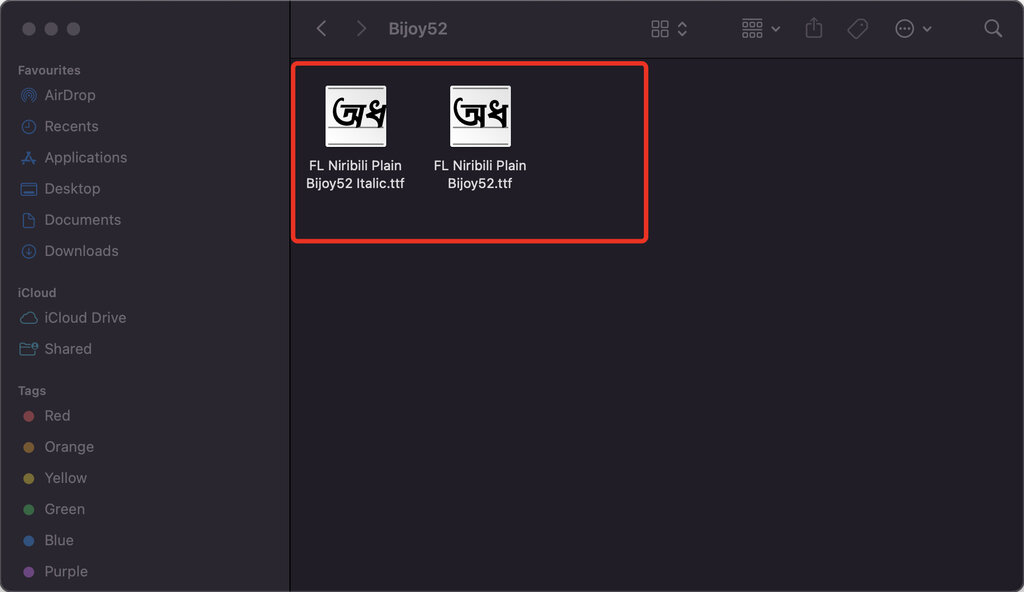
- Download the font: First, download the font file you want to install. Fonts are often distributed in compressed formats, like ZIP files. If the font file is in a ZIP archive, double-click on it to extract its contents.
- Install the font: Once you have the font file ready, you can install it by following these steps:
Option 1: Double-Click Install:
Double-click on the font file (with the .ttf or .otf extension).
A preview of the font will open in the Font Book application.
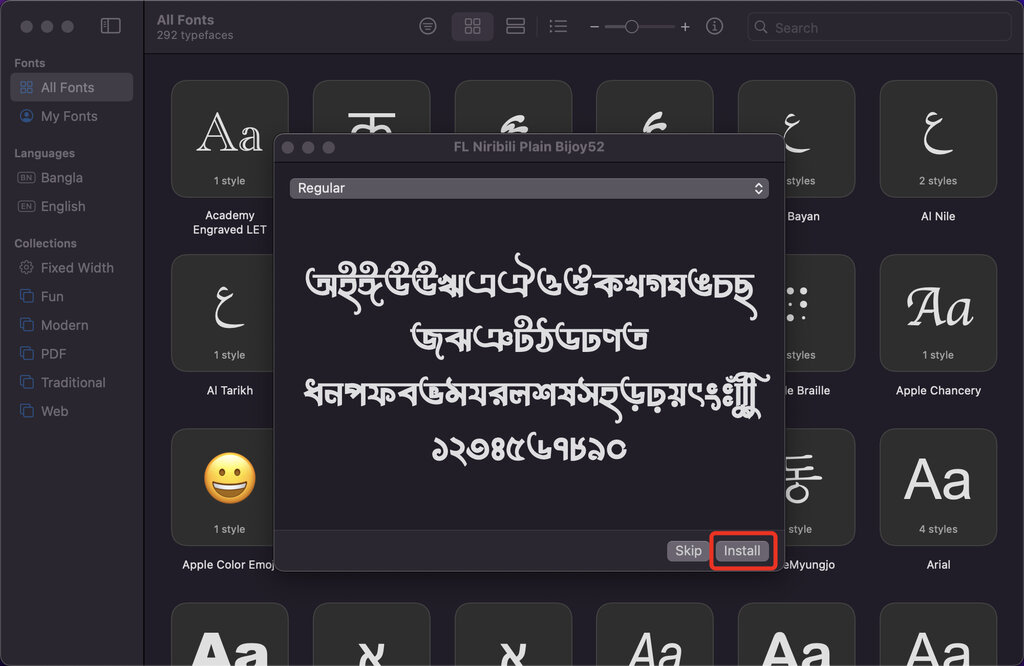
Click the “Install” button in the preview window.
Option 2: Manual Installation:
Open the Font Book application on your Mac. You can find it in the Applications folder or by using Spotlight search (press Cmd + Space and start typing “Font Book”).
In Font Book, go to “File” > “Add Fonts.” Navigate to the location where you saved the font file, select it, and click “Open.”
That’s it! The font should now be available for use in various applications on your Windows system. Keep in mind that you may need to restart any applications that were open during the font installation for them to recognise the new font.