We are already familiar with installing Bengali fonts on our Windows and Mac computers. But suppose you have a WordPress website with Bengali contents and want to add custom Bengali fonts to it. So the question is, how do you do it? That is what this guide will address. You don’t need to have any coding knowledge; we will do that by using a plugin.
Here, you will find the necessary steps to add custom Bengali fonts to your WordPress website using a simple plugin. I hope you have some basic knowledge about installing plugins on the WordPress website.
Convert TTF to WOFF2 Web Font
The first thing we’ll do is change the TTF font to a webfont (woff/woff2). You need to have a web font in order to use fonts on your site. You should first get the font file you want to use on your site.
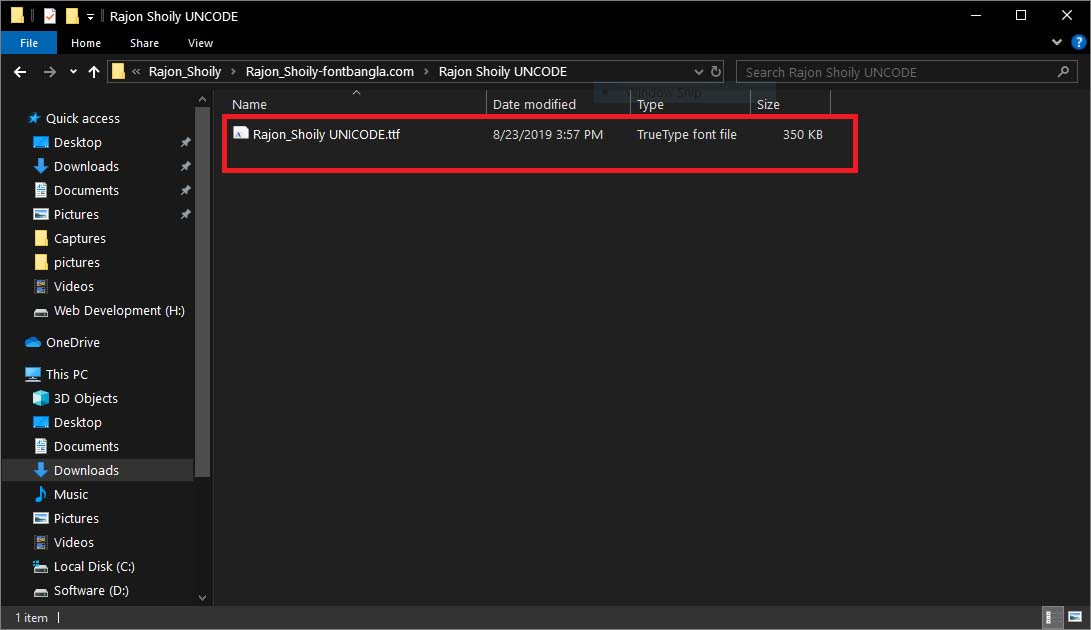
Once you have downloaded the font zip file, open it and look inside. You will find a Unicode-font TTF file. When files are changed to web fonts, they can only be added to websites as Unicode TTF files.
We are now going to change this unicode ttf file to a WOFF2 web font. This means that if you search Google for “ttf to woff2 converter” you will find a huge number of them. It’s simple and quick to use the CloudConverter.
Upload the Unicode TTF file and click the “Convert” button. In a few seconds, you’ll be able to get the WOFF2 web font.
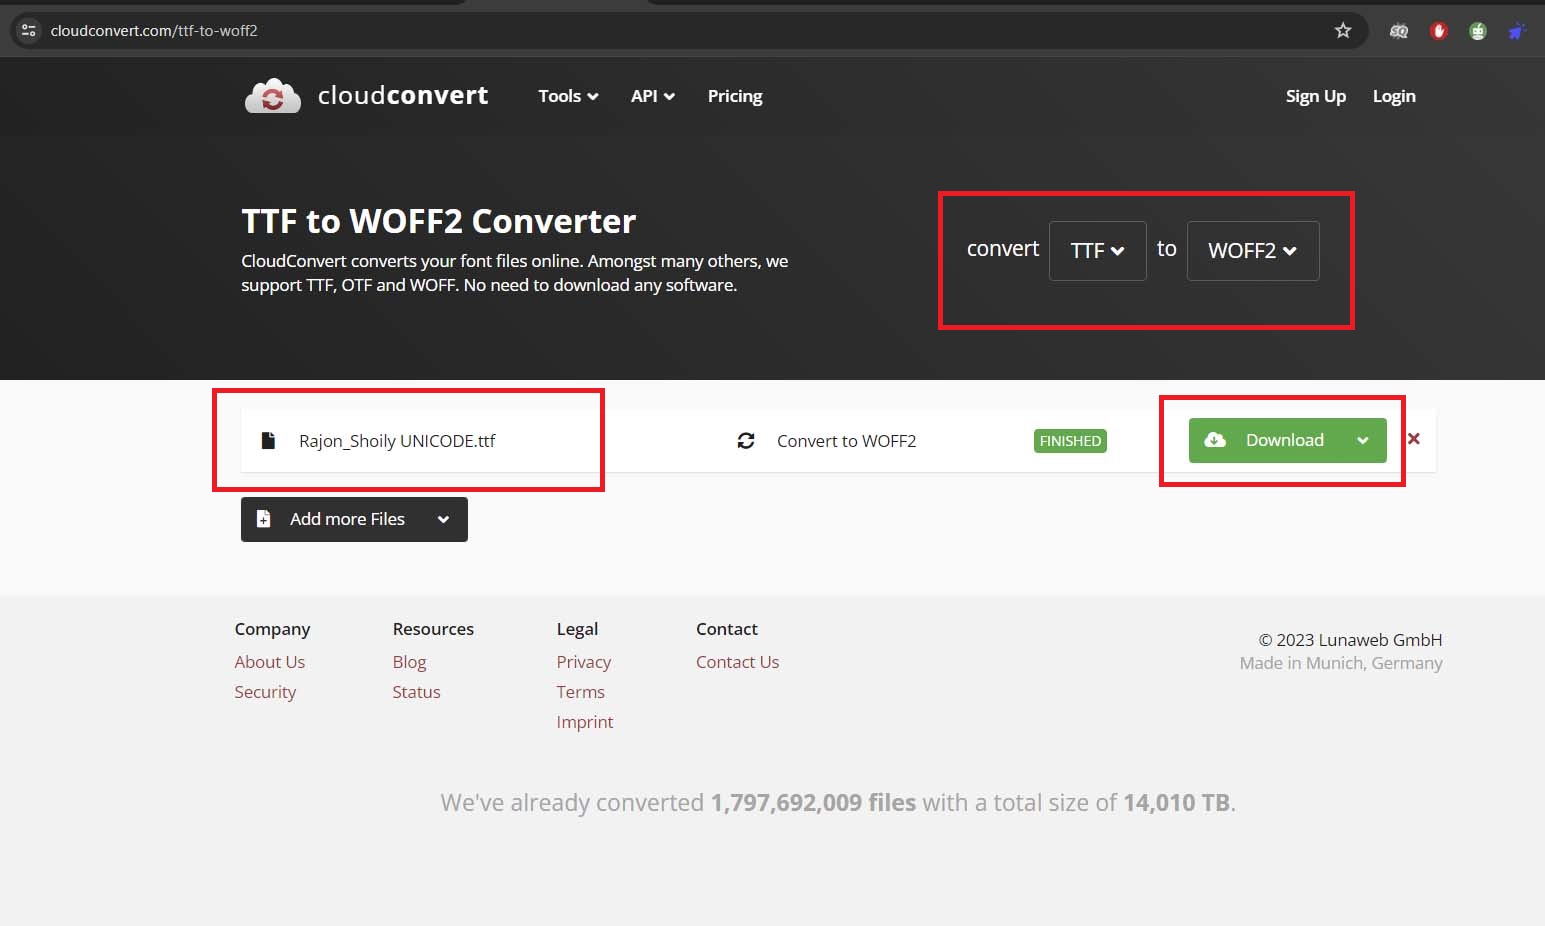
We have converted the TTF to a web font that we can add to our website. Now, the main procedure has started.
Adding Bengali Fonts to WordPress Website
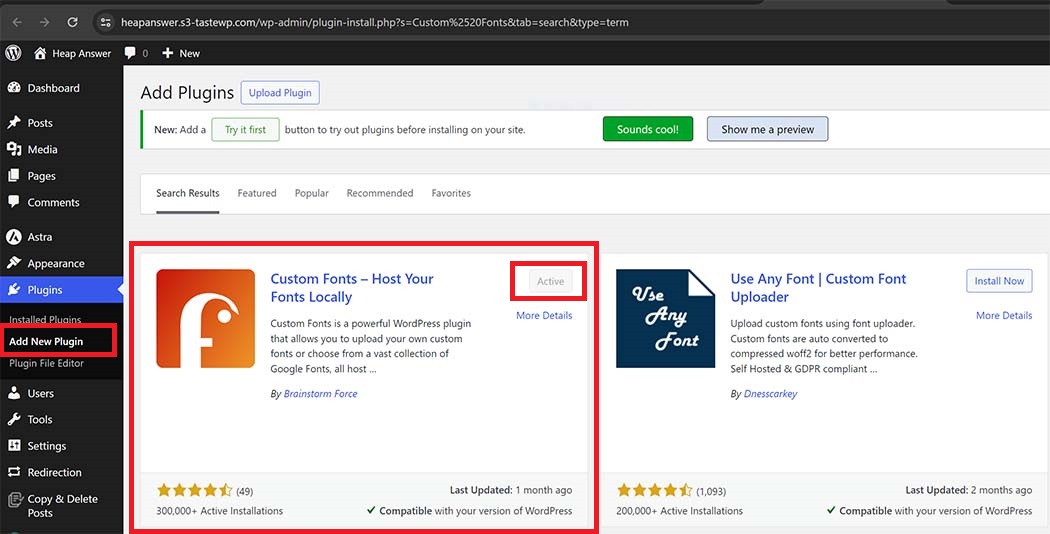
We have a web font for our WordPress website. Now the main procedure has started. Now, head over to the WordPress dashboard and install the Custom Fonts plugin.
The Custom Fonts feature allows users to upload their own custom fonts or select from an extensive assortment of Google Fonts, which are all stored locally on their web server.
By hosting fonts locally, the efficacy of a website can be significantly enhanced. As a result of the typefaces loading directly from your server, external requests are minimised, which substantially decreases page load times.
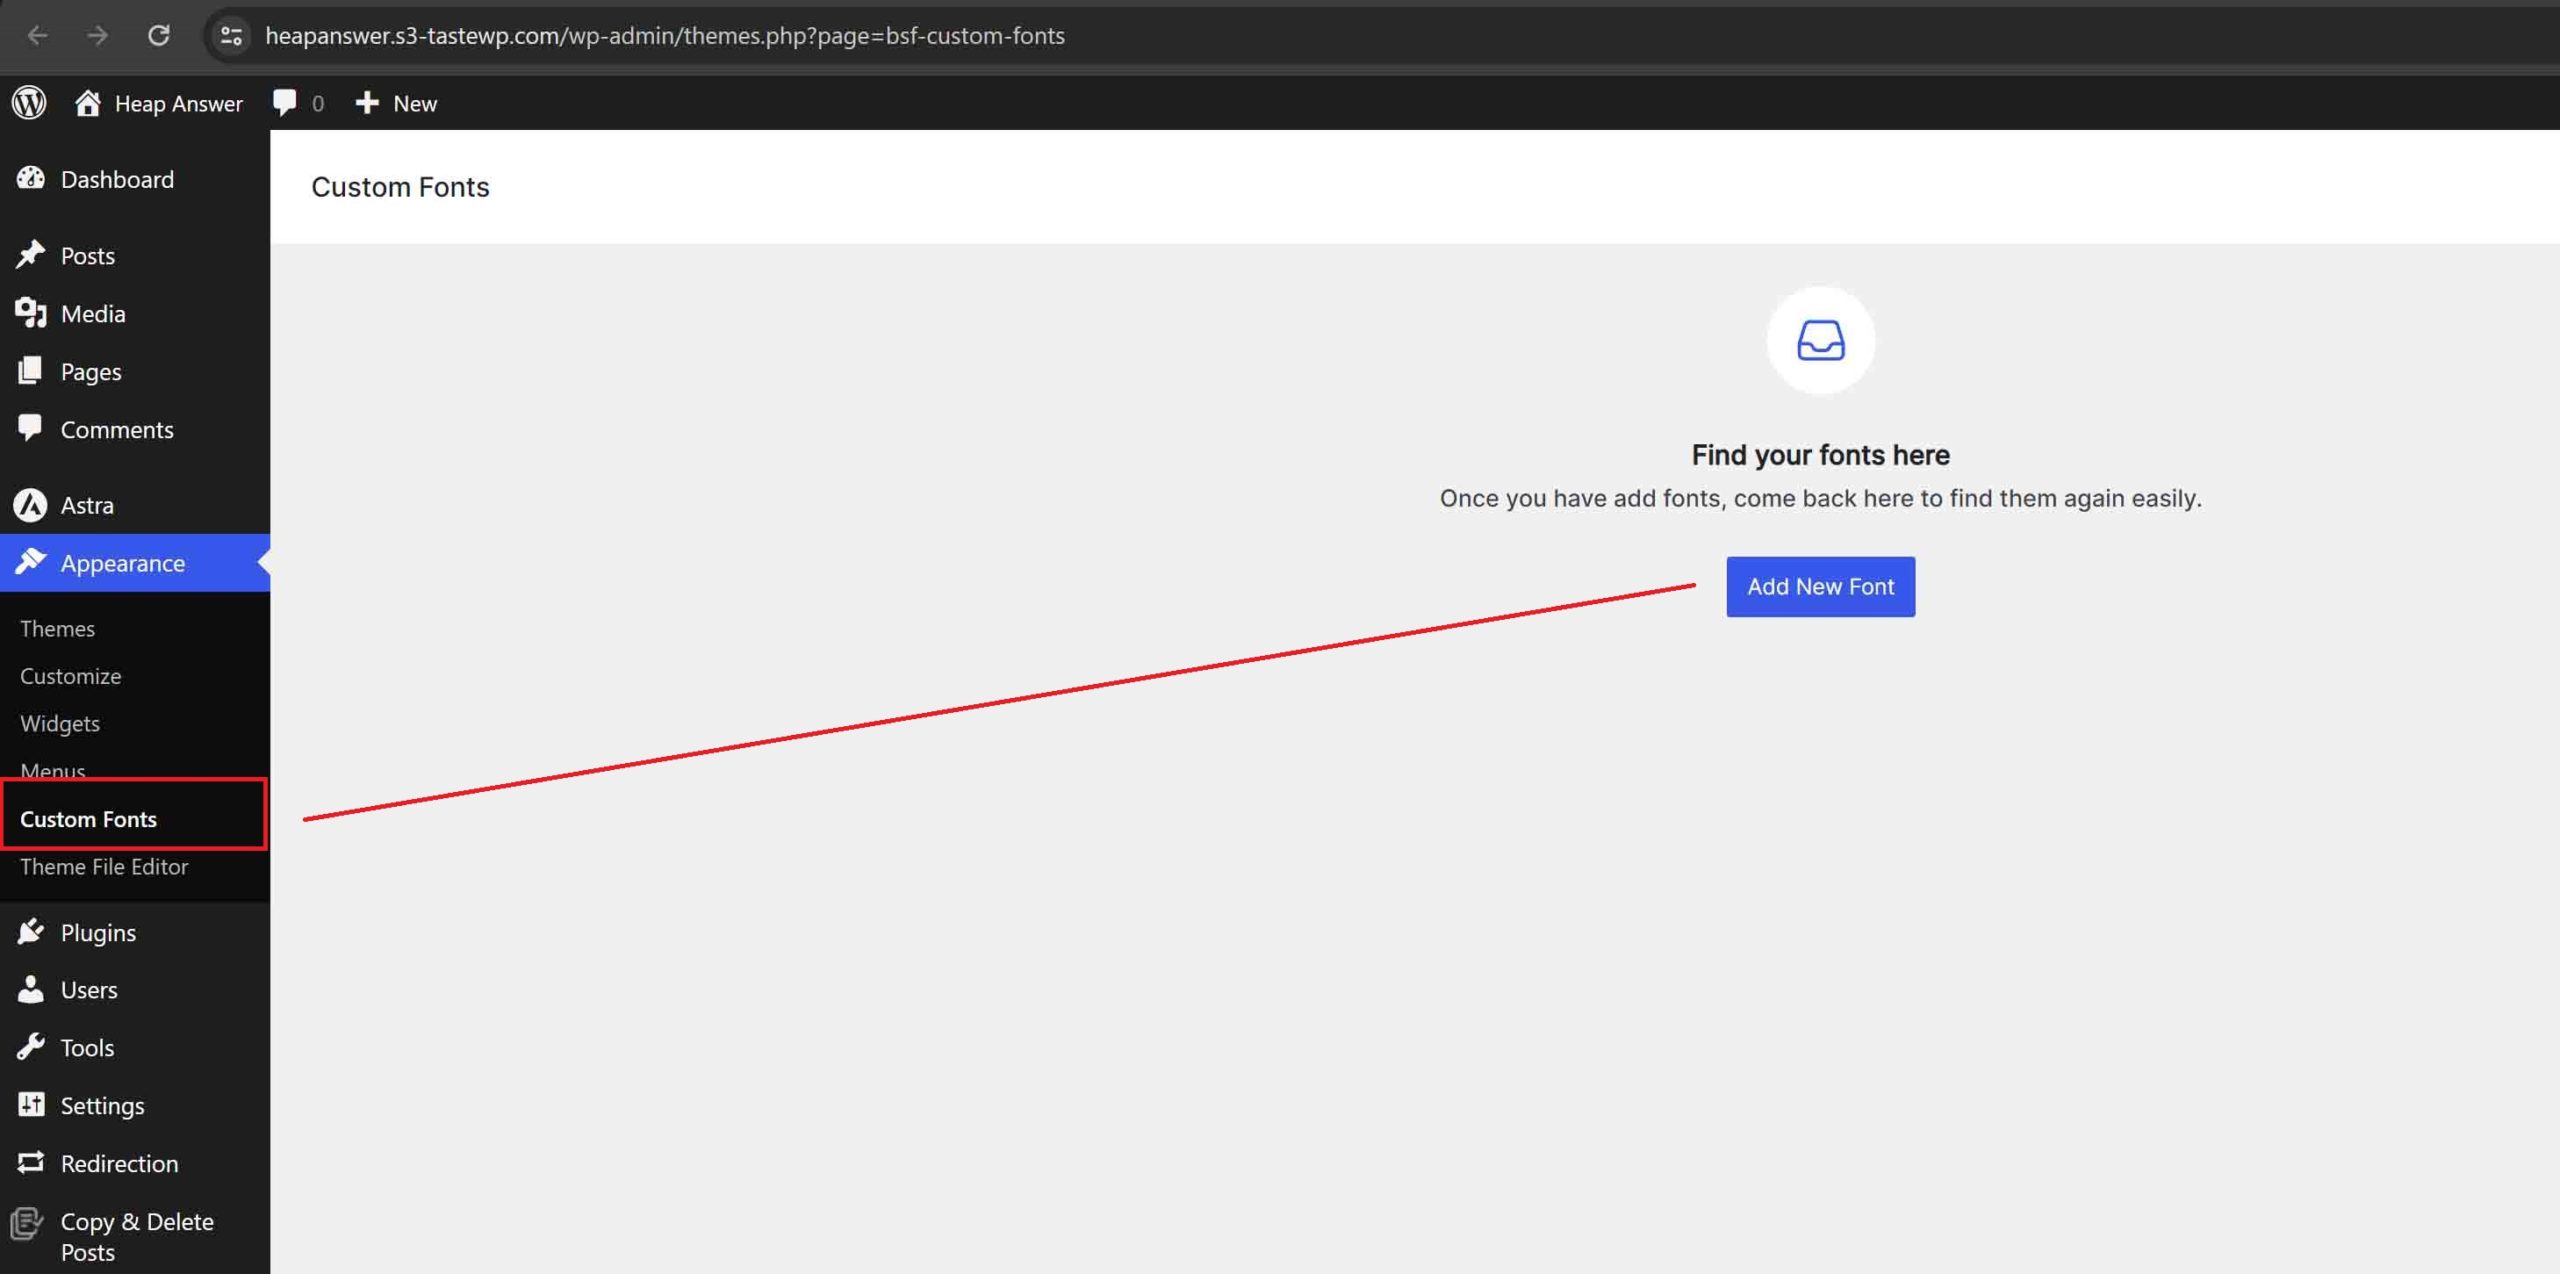
After installing the plugin, head over to Appearance->Custom Fonts->Add New.
Now, name the font that you are going to upload, select the WOFF2 font, and then hit the Save button.
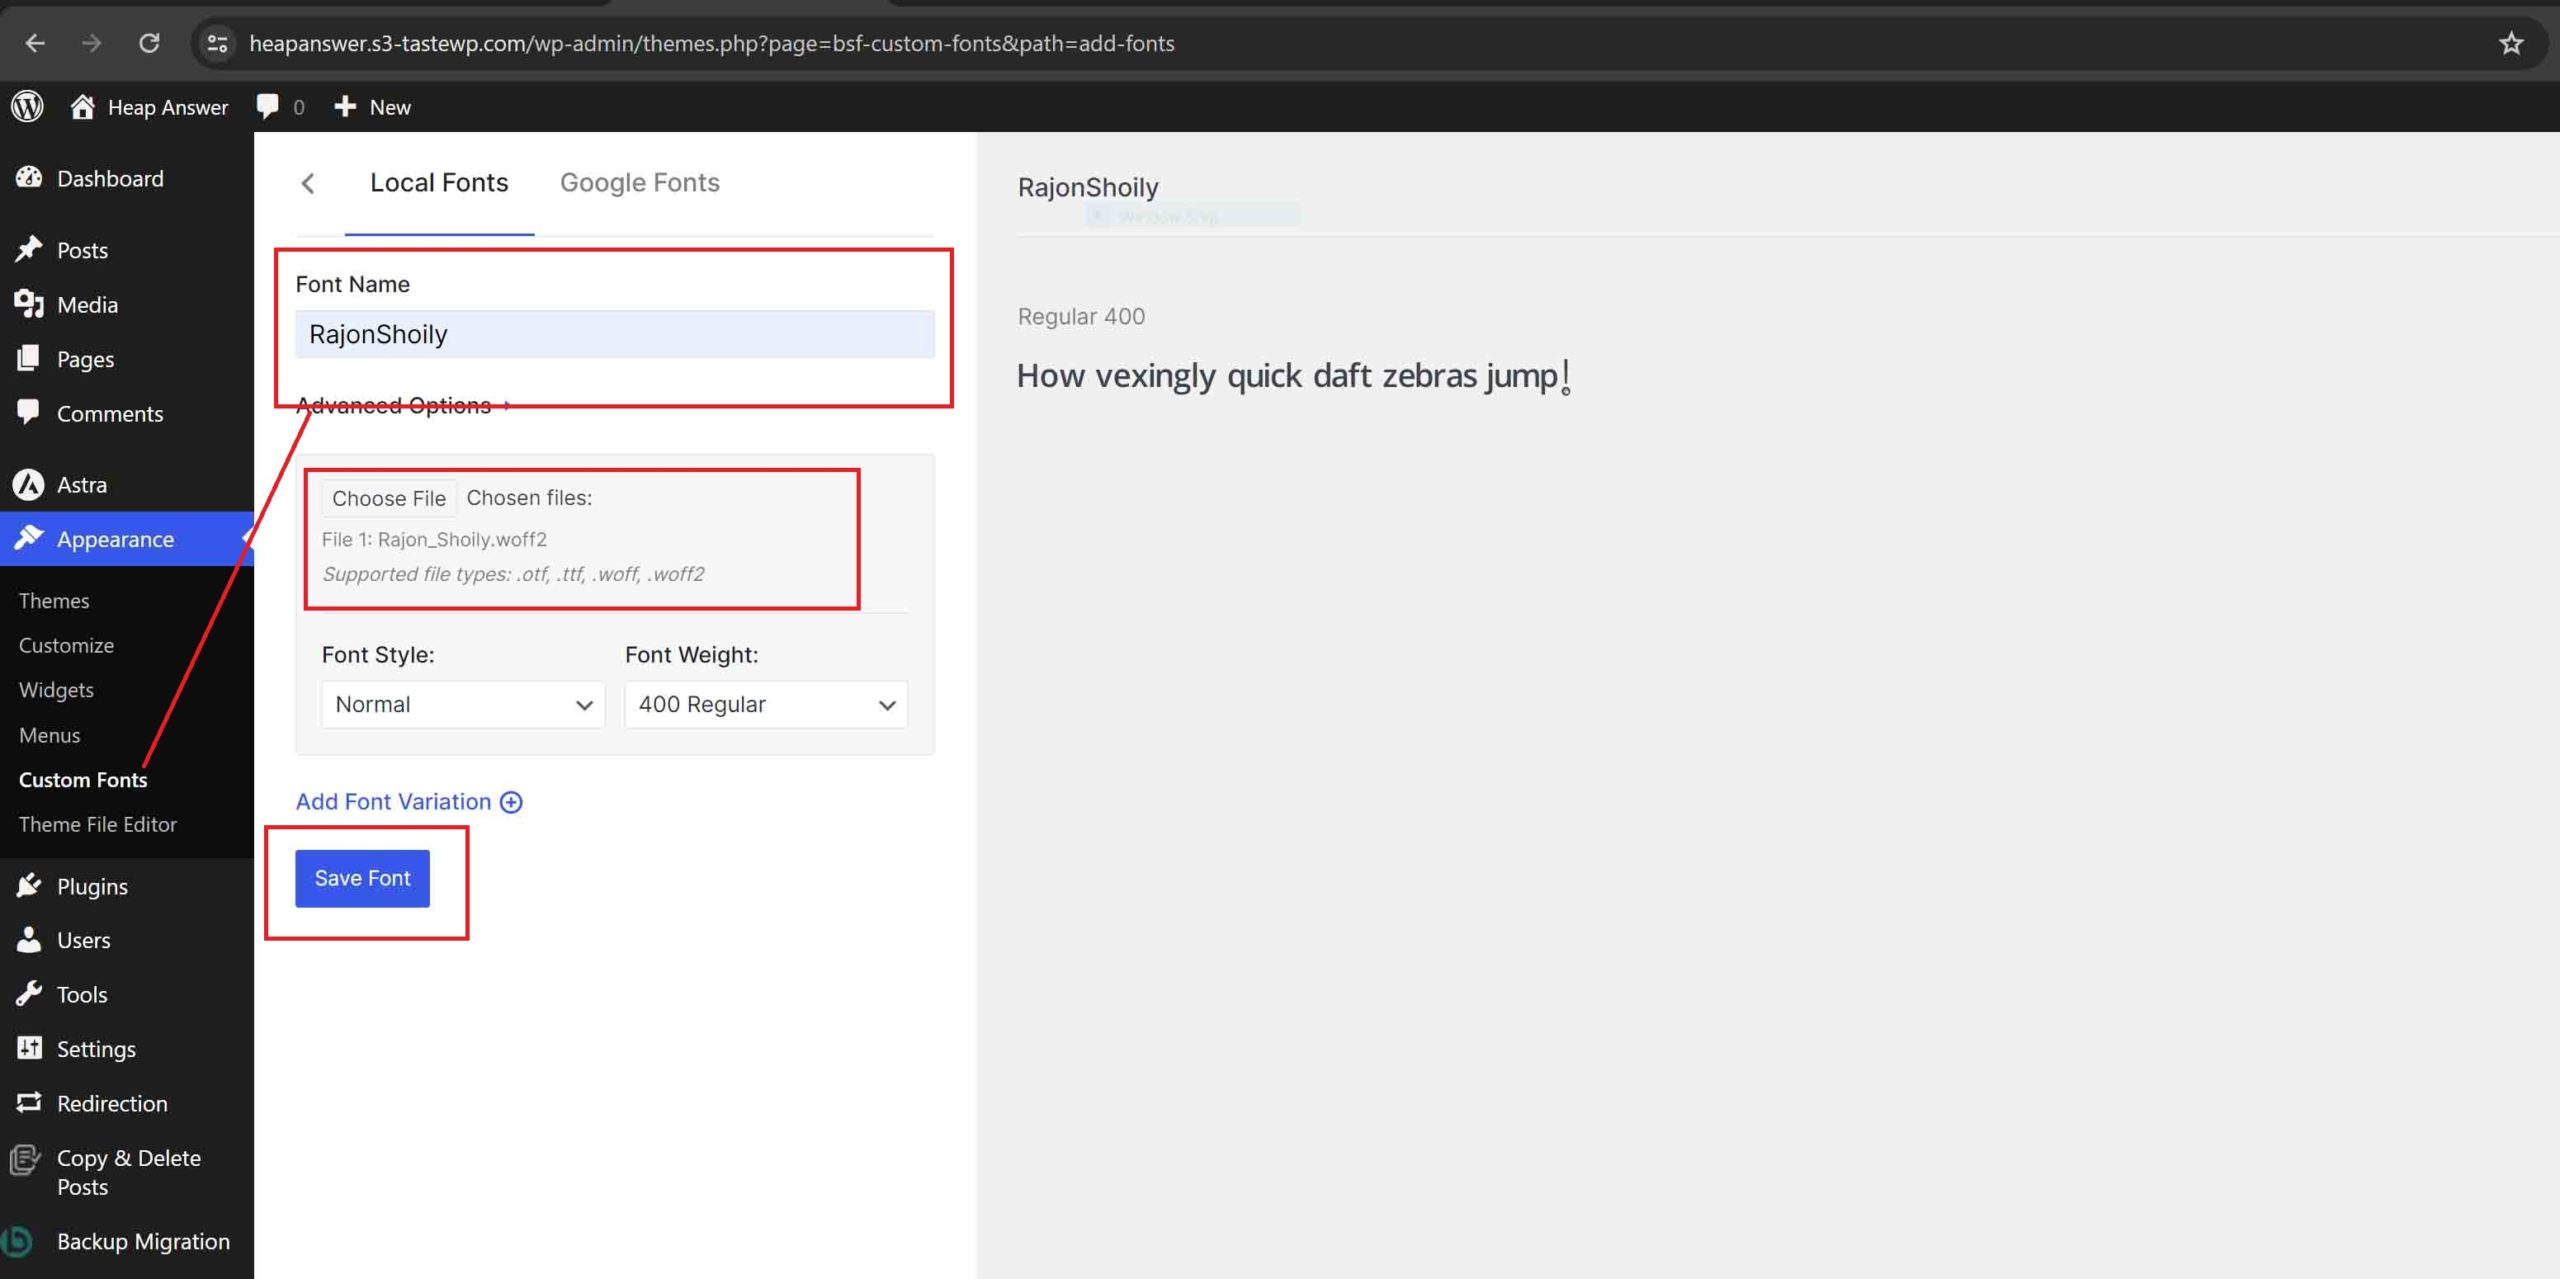
Remember the font name that you provided here, because this will be the font family name of your custom font.
Now, head over to Appearance->Customize->Additional CSS from the dashboard and apply the font family to the whole contents of the website.
    body{
          font-family:RajonShoily;
    }
See the following screenshot:.
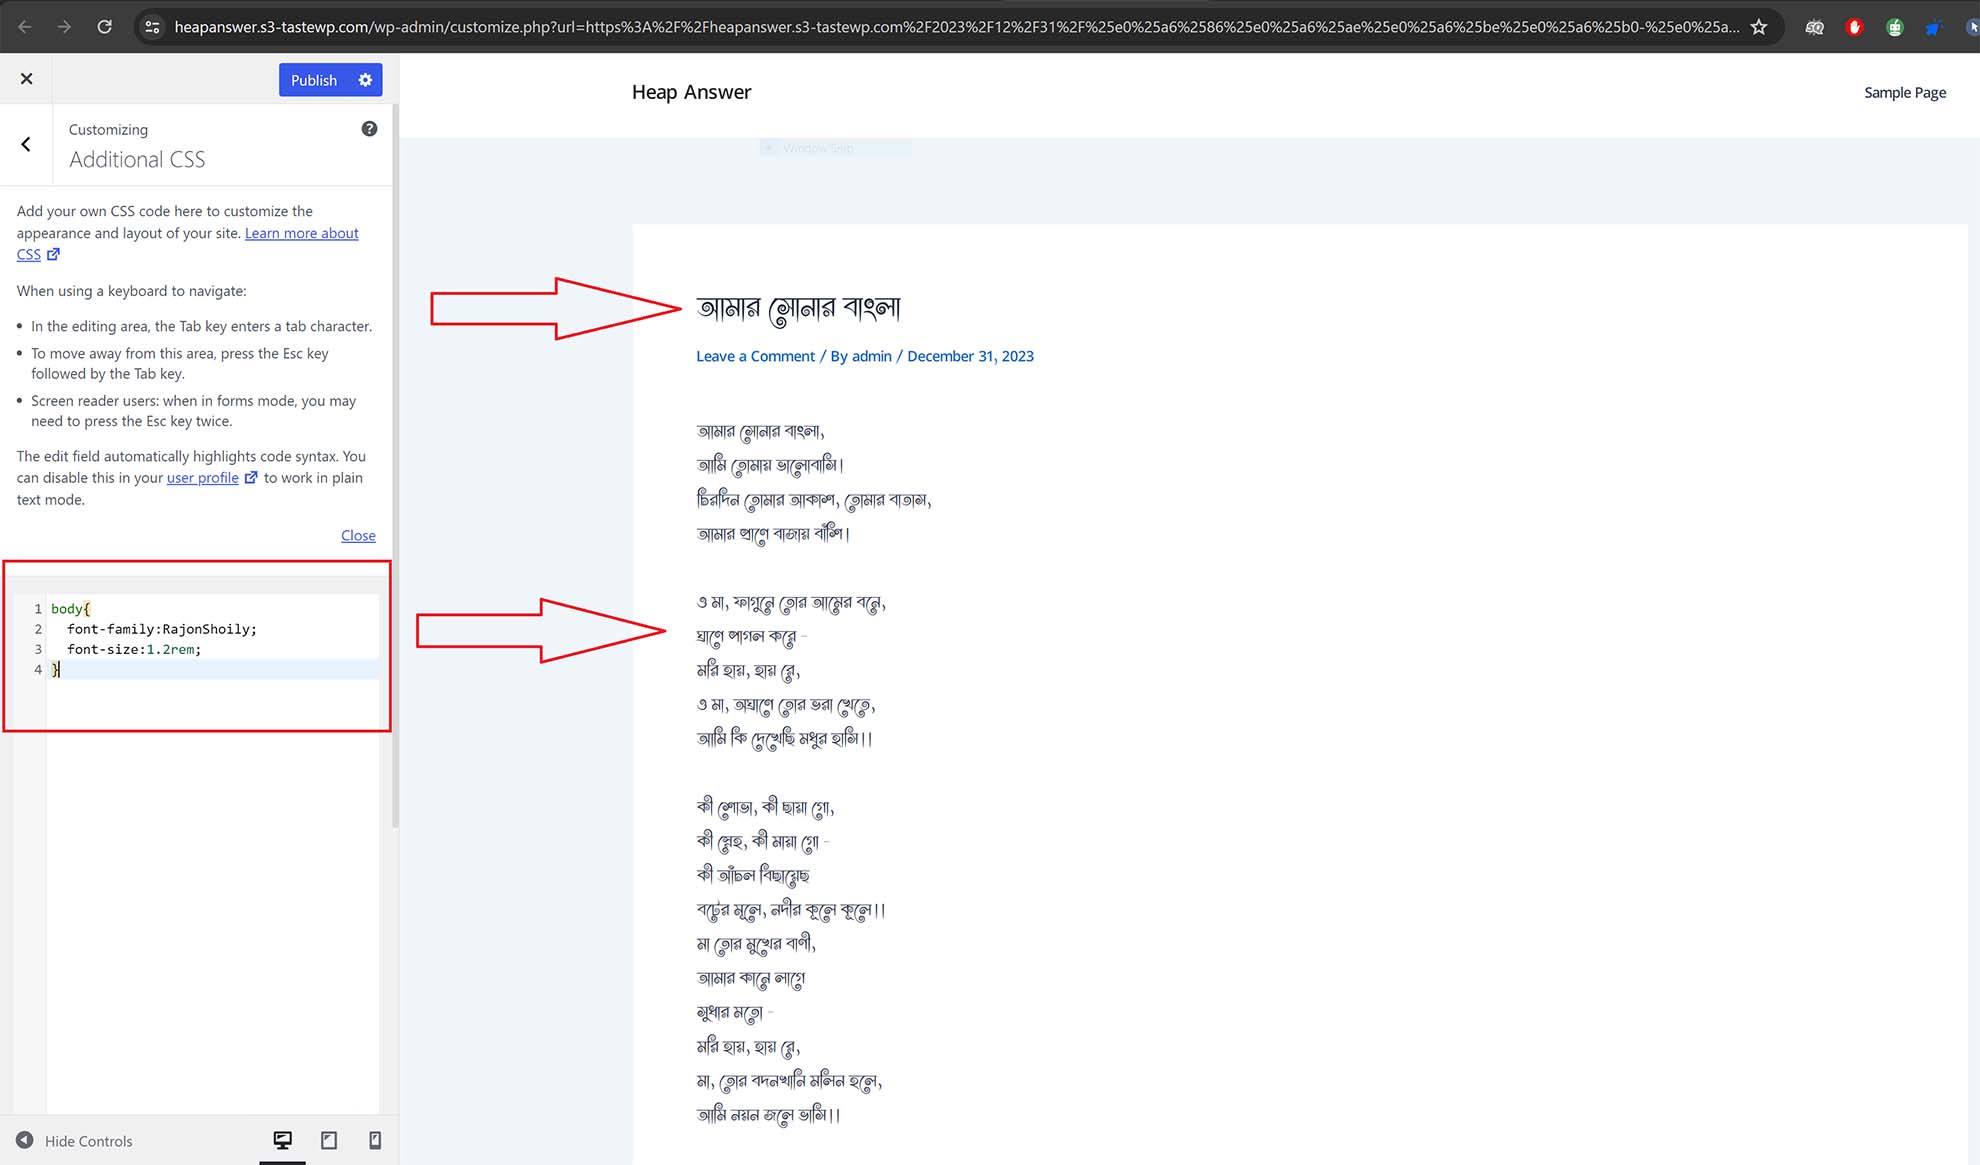
Instantly, you will see the changes in the fonts of your WordPress website. You can increase the text size by adding font-size CSS if you want.
That’s it! I hope you successfully added custom Bengali fonts to your WordPress website. If you have any questions about this guide, let us know.